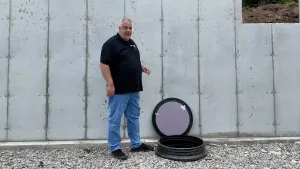
Zip System - Pro Tips incl Liquid Flash + Zip-R #BUILDTight
Want to take your Zip walls to the next level? In this video, Matt Risinger, master builder, is on his friend's job site for the inside on Zips liquid flash. The house is being built with Zip-R sheathing and it's time to go through how it is installed. Starting right in on the watertight and super airtight system, we'll look at the steps from foundation on up. Beginning with the bottom juncture where there's typically a through-wall flashing, we'd use primer and go back with a nice thick through wall flashing tape. Here, it's taped off with painter's tape for a good horizontal line and caulked the bottom of it with Zip. We bring the material up to approximately 12 inches on the wall for a very robust water and insect barrier. Although Zip does not require the covering of fasteners, we still recommend doing it. We also do the corners and once at the joints of the sheathing we have an eighth of an inch gap for minimal expansion and contraction. Here, with a caulking tube, we zigzag a little caulking bead and then come back and go right back over it and cover it back up. When finished with the outside of the house we are both watertight and super airtight.From the top of the sheathing to the roof, sometimes we put the sheathing up and other times we cut blocks. Then we caulk it to the roof line itself leaving no room for air to be able to infiltrate. At windows we use the exact same process, taking the material on to the window box. While you can stop at 6, we do the entire perimeter of that of the rough opening and then install the window and hit all the exterior flanges of our window, but we allow weeping at the bottom. To maintain our good air sealing we come back on the inside and use the same product. Typically, we put in a three-eighths backer rod or a foam backer rod and connect the material used on the outside to the inside so there's no transition to an alternate material.Pay attention to nail pattern and go by the engineer's data sheet for spacing, type of fastener, etc. Once you do that, it's simple, there's a full exterior continuous insulation and a thermal break on the studs and then when you insulate the two by sixes in the inside you have a killer insulation package on the house.

 Share on facebook
 Tweet
Tweet Email
Email Share on Linkedin


