Search Content

Use the search bar above, explore content using the categories below, or log in to find your favorites.

Create An Account

Thank you for choosing to create an account with us.

Please note that creating an account is optional, but helps us better tailor the content we show you.


Please enter your email address and choose a password.

By creating an account, you agree to our Terms and Conditions and our Privacy Policy

Log in

Tell us a little about yourself


Choose Areas of Interest

Please tell us a little more about your profession.

This is optional, but lets us better tailor content to your specific interests.


You can read our policy on data collection and privacy here.

Channels that Interest You

Finally, check which channels interest you so you can see more relevant content. Choose as many as you like. You can also come back here and edit these settings later.


Share Content

Share our content with your friends and colleagues using the links below.


Sign up Forgot your password?
Home 
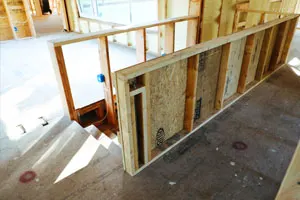
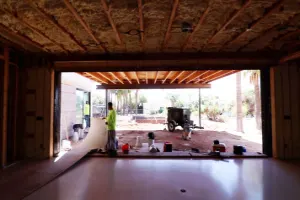
How to Install Flush Base Board - Modern Trim Detail
Installing flush baseboards for your modern home is an art. In this video, Matt Risinger, master builder shows us how to do flush baseboards. Most houses have the baseboard added on top of the sheetrock. Instead, consider a flush or recessed baseboard. At this building site, the drywall stage is beginning. This is the first place where you can see where the recessed base is going to go into the house. On the stairway to the second floor, instead of doing skirt boards, we're going to recess them. First, the finish carpenters put in the locations where that base is going. Plywood is screwed into the studs for a reference point for the drywall guys to hang the drywall to that plywood.At the bottom of the sheetrock we had to finish that off with a trim piece. This makes a really nice shadow line of the gap before the baseboard gets put down after the trim is installed. The next step is to install the flooring all the way under the sheetrock, a longer distance than normal, so it needs to be installed very early. The next step is doing a recessed or flush base, in this case a 1 x 6. Here, we're using Windsor, a pre-primed pine. Poplar is also good. We put a cut into the back of the base that makes up for that extra eighth-inch gap. The 5/8-inch sheetrock needs to mate up with 3/4-inch trim. We put a curve down in the back and that transition is beautiful without quarter rounds or additional moldings. It's a flush a contemporary look and the craftsmanship is second to none here

Showing result 1 to 8 of 45